Pages

Wednesday, October 7, 2015

A New Adventure - Sewing Camp

This summer I took on a new project.  I had two sewing camps for kids.  The camps were a product of a desire to share my love of sewing and crafting with the younger generation.  I learned to sew as a child and have enjoyed a lifetime of creative expression.

A greeting at the front door.

One summer my mother taught a friend and I how to sew.  We made several items of clothing and felt a great amount of accomplishment with the completion of each project.  This knowledge opened up a whole new world of fabric, notions and much more.  In the years to come I created some clothing but mainly home décor items.

When my children were small I was introduced into the world of quilting.  Quilting has inspired me to try many new techniques and projects.  In today's world sewing is making a come back and growing in popularity.  The younger generation is drawn to the creative expression and the endless possibilities that sewing provides.

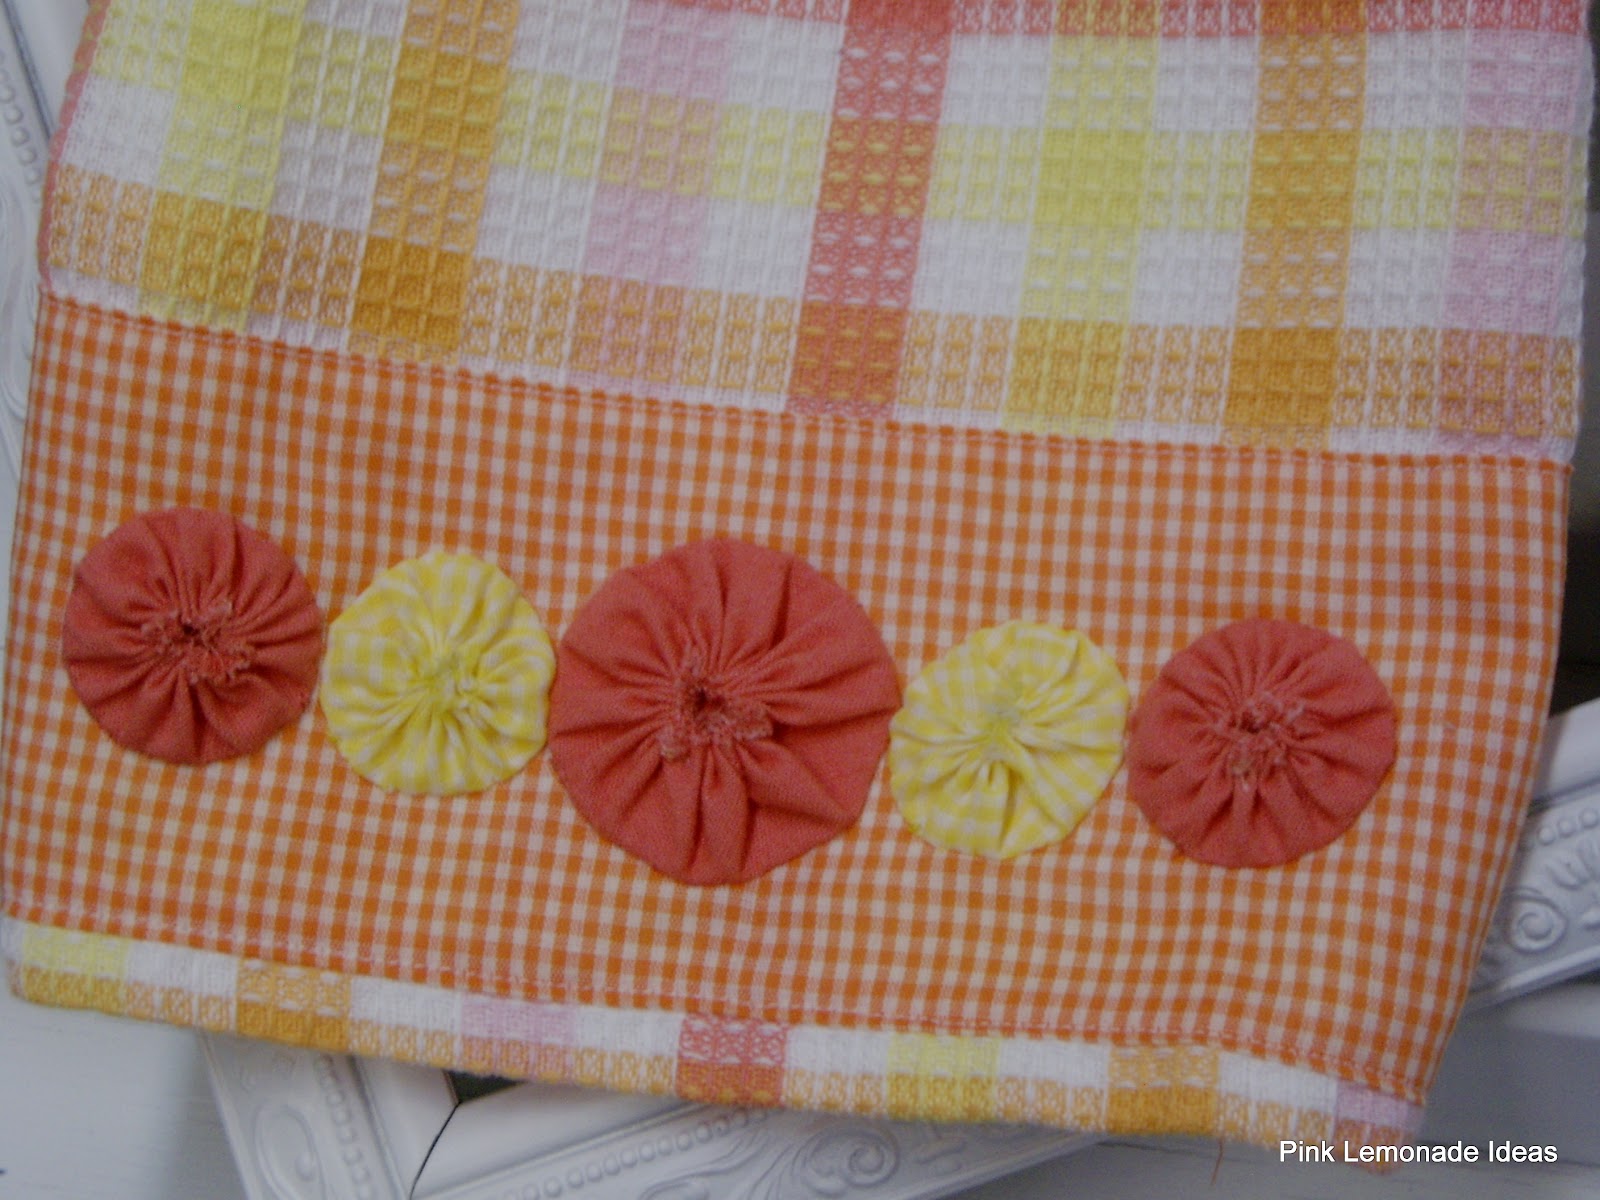
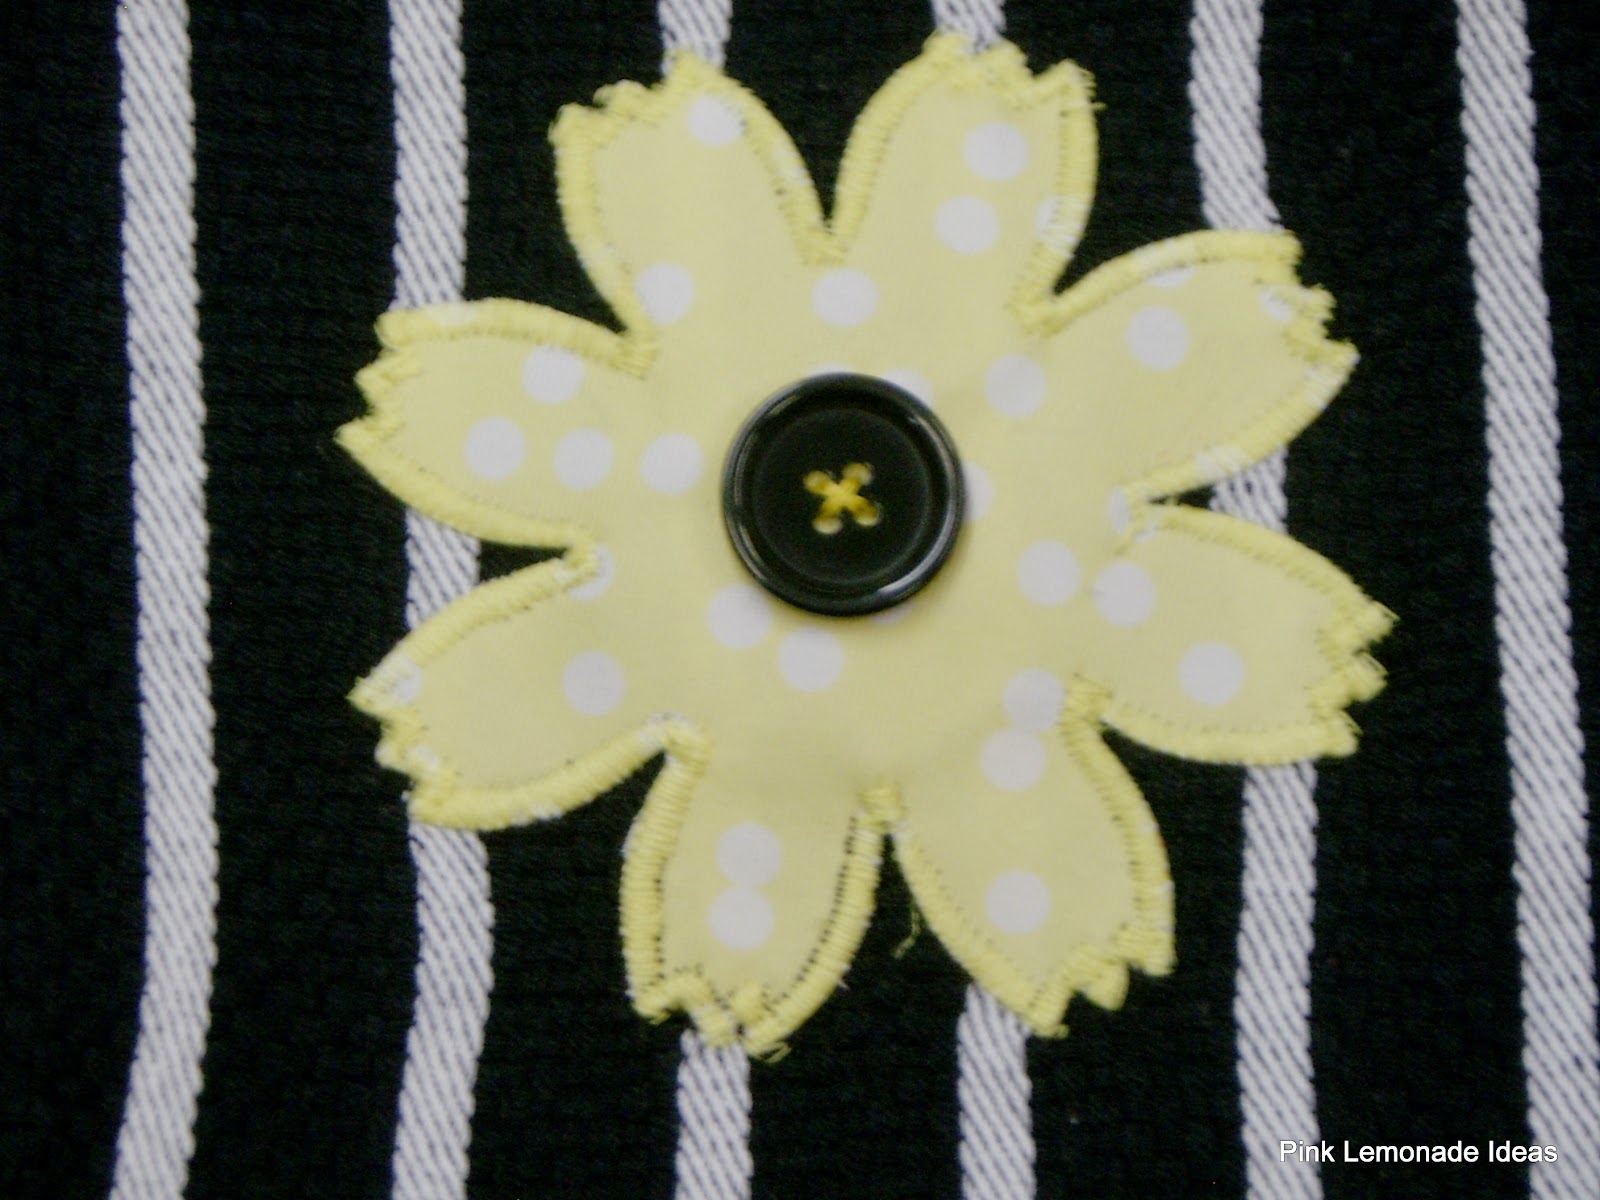
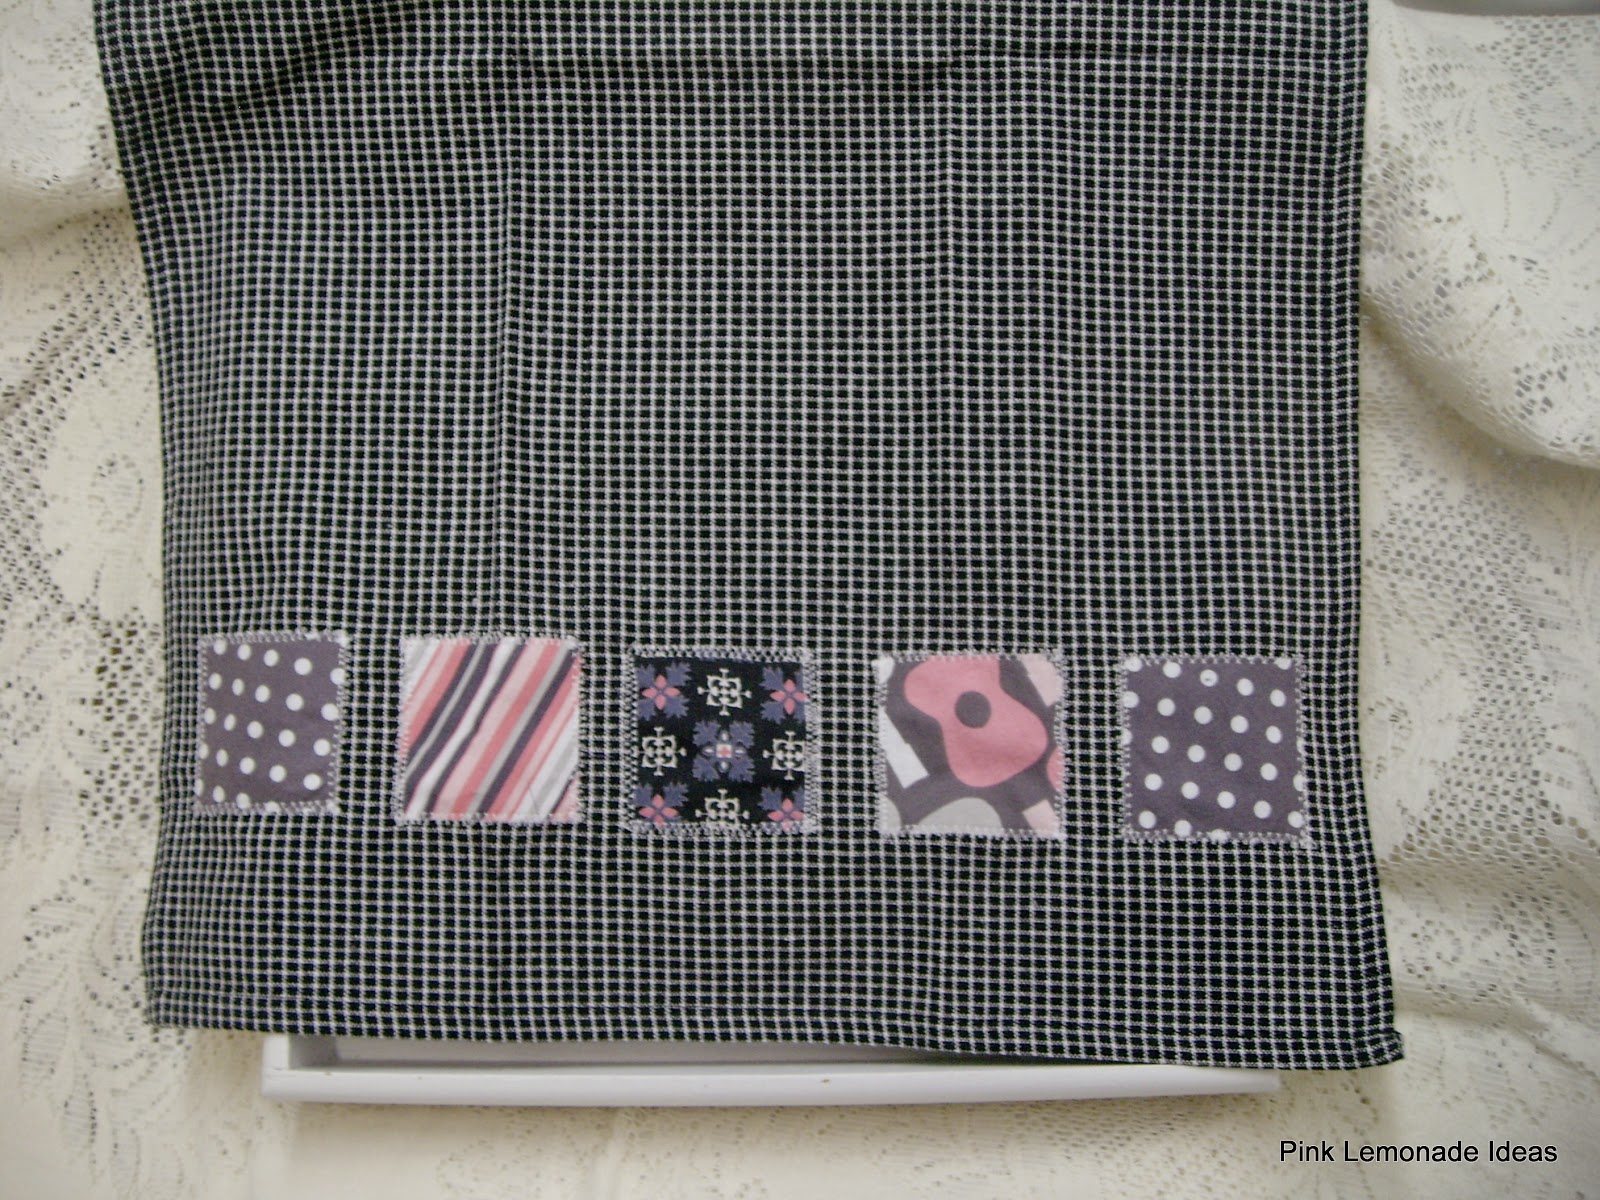
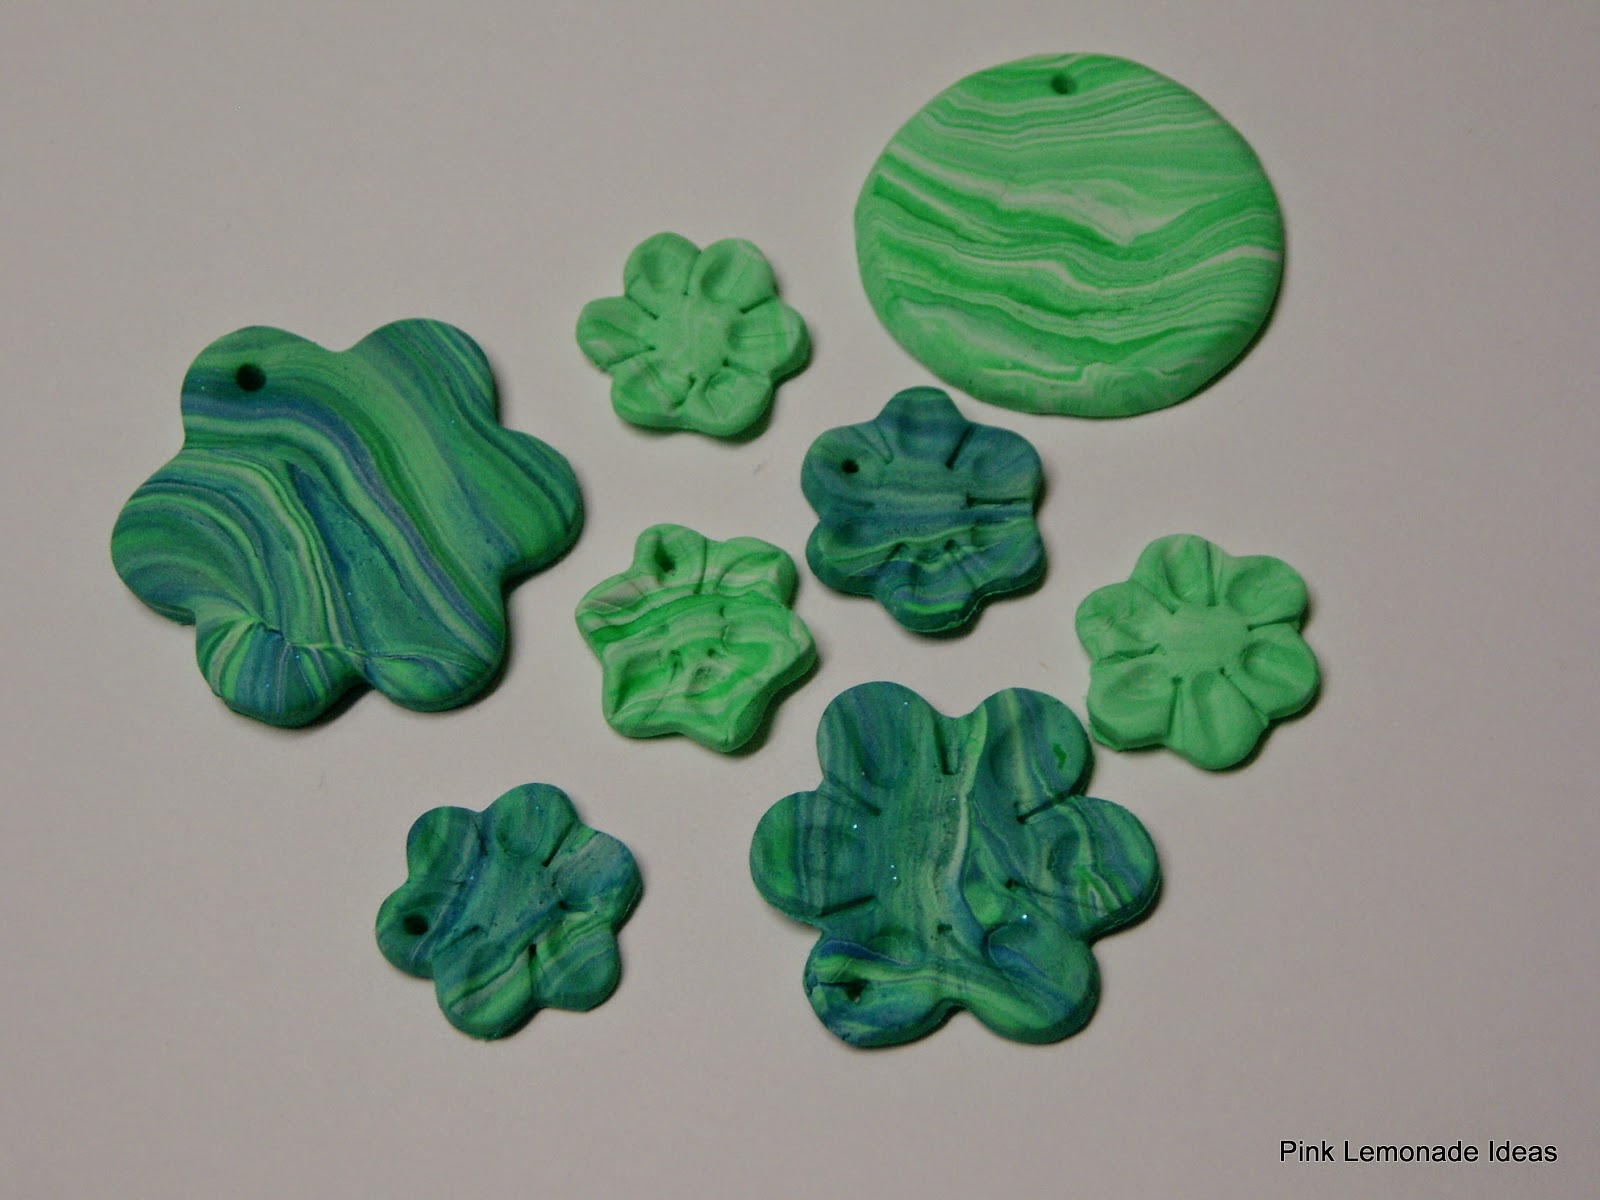
In the camps the kids made several projects using both hand and machine stitching.  The projects were designed around using only a small amount of fabric or recycled items.  This allows for the campers to continue the projects at home with out a huge investment in fabric or supplies.

A great group of girls for my August camp.

The campers had a great time and learned a lot.  But I think I had just as much fun as they did.  In the next few posts I will show you some of the projects we made during camp.  Hopefully this will inspire you to share your sewing talents with the next generation.

Danna

Wednesday, September 9, 2015

College Graduation Party 2015

Wow, it has been a while since I have posted.  Things around our house have been crazy busy and I feel like I have been on a roller coaster that keeps passing the loading station and goes for another round. 

We celebrated our daughters college graduation in early May but did not have her party until the end of  May to allow all of her friends to get back into town.  The celebration and graduation were landmark events.  She is our oldest child and it seems like yesterday we were walking into Kindergarten and now she is done with college.  Where did that time go? 

 She is one happy graduate!


I did make several items for her party and one that she can later use in her classroom. The celebration was all in purple and white since that is her school's colors.  The first item I made was a "Congrats" book page banner.

Book page banner she can use later in her classroom
 
I used the pages from a chapter book and then various colors of purple scrapbook paper.  The one that says Ms. Webber we will laminate so she can use it in her classroom.  The "Congrats" one I will save and use at our son's graduation party in a few years since his school colors are also purple and white.  Yes we bleed purple at our house.  Different schools but same colors.
 
These banners are simple to make if you want to know how to make one check out these posts Spring is Here and Picture Book Pennants.
 
We used purple pillows and her school afghan on the couch.  We placed her decorated cap and chord on the mantel along with a school water bottle.  

Her decorate cap and water bottle add a punch of purple to the mantel.

 
On the entertainment center we put her stole, family pictures, graduation pictures and some purple filler items. 
 
Pictures of our family and her through out her life.

Her stole with the school seal.

Another water bottle and yarn add the purple to this area.
 

Front porch sign.
The entry table was draped with a large piece of purple fabric with the raw edges turned under.  Simple things can be quickly gathered and put together based around a theme or color.  This process adds just the right touch of fun to the festivities and doesn't cost much at all.  So for your next party base your decorations on a theme and start raiding your closets and cabinets.  Your decorations will come together quickly.


Brother and sister - one school against the other.

Our happy family.
 
As our family crosses another milestone in our journey we are looking forward to what the future holds for each of us.  May your journey be filled with good times and lots of smiles.
 
Danna

Tuesday, September 8, 2015

Birthday Book Cover Sign

I have been making book cover signs lately for various occasions.  We have had several baby showers at school so I have made signs for the new arrivals.  Check out those signs at these posts Baby Book Cover Sign and Another Baby Shower Gift. 

A teacher at school wanted a sign for a birthday gift for a little girl that loves frilly girl things.  Here is the finished product.

I love her name - Saige it is very unique.

I used scrapbook paper in a fun flower pattern for the top.  The bottom section is covered by a coordinating blue paper.  To cover the seam between the papers I used a tiny pink ric rack.  The with lace at the bottom hangs over the edge and adds another layer of dimension.


The little girls name was added using raised scrapbook puffy squares and gold stick on letters.  At the top I placed a small clothespin covered by an embellishment.  The clothespin allows you to change out what is clipped to the sign.  It is a great way to show off a child's latest drawing or souvenir.  I clipped a small card with a heart and an embellishment that says let's celebrate.

The sign turned out to be fun, colorful and festive.  I hope she will think it is a wonderful addition to her bedroom.  And hopefully it will hold countless pictures in the future.

Danna


Thursday, May 14, 2015

New Birds in the Flock

If you have been following this blog and read the posts regarding my classroom at school you will know that I love owls.  Well several weeks ago I received two new friends to add to my flock.  The first was an owl bag that my mother-in-law gave me for my birthday.

My new owl bag.
 
I love the bag and the owl.  She is so cute with her big bright eyes.  I think this will become m new go bag for travelling to my Craft Class to Go parties.  It has lots of pockets and an nice large middle section so it will hold all my office type items nicely.
 
The second owl added to the flock was another birthday gift from a friend at work.  He told me that every time he and his wife see an owl they think of me.  How sweet is that! I know I have friends that when I see certain items it reminds me of them and it always makes me smile.  This large owl is a cookie jar and the colors match perfectly to my classroom.  I am not the cookie baking type so she will probably stay at school for now.  Although she might come home for a visit this summer just in case I get the urge to bake something.  It will be more likely that I will get cookies from the store to fill her up.
 

Owl cookie jar.
 
It is always a nice surprise when you receive a gift that is just right for you.  The next time I see something that reminds me of one of my friends I think I will buy it and surprise them so they will know they are loved.  Maybe you can do the same for your friends.
 
Danna

Tuesday, May 12, 2015

Another Baby Shower Gift

As I stated in an earlier post Baby Book Cover Sign there are several pregnant teachers at my school this year.  We just had our second shower so I made another book cover sign for the expectant mom.  She is having a girl so I used a pink and yellow color scheme.


The pink and yellow stripe is soft yet whimsical.  Like the last one I made the clothespin in the middle allowing her to change the picture or sign.  To spell out the baby's name I used a series of scrapbook embellishments that were plastic raised squares in various shades of pink.  I then placed gold letters on the squares.  To finish the bottom edge I glued a wide rick rack in pink to the bottom.  The small sign I attached to the clothespin says "Shh, Baby Sleeping".

These book cover signs are great for a baby gift.  They allow the parents to change out the pictures or notes for a different look each time.

Danna

Friday, May 8, 2015

Another Graduation

This week our daughter will graduate from college.  It is hard to believe that just a few short years ago she was graduating from high school.  Her degree is in Elementary Education and she is excited about starting her teaching career.  We are extremely proud of her and all that she has accomplished.


I know she will make a great teacher because when she talks about her students her eyes light up and her whole body becomes animated.  It is nice to see a young person passionate about their career.


As we begin to prepare her classroom I will share her ideas and projects.  She is crazy about sock monkeys so we have already begun to gather sock monkey classroom décor.  I an making her a sock monkey sign for her door using a book cover and book pages.


Be sure to encourage those young people in your life to pursue their passion for their future career.  Being passionate about what you do can make going to work a fun thing not a burden.


Danna

Monday, April 27, 2015

Playing with Clay

I am excitedly preparing for the Kids Craft and Sewing Camps I will be teaching this summer.  I have wanted to teach this type of a camp for a loooooooong time.  So while sitting in the hallway monitoring the standardized testing I decided this was the year. 

As I began to gather ideas of what crafts we would be doing I came across some clay beads I made some time ago.  I remember how much fun it was to twist and mix the colors together and then create a bead or pendant.  This will be one of the crafts the kids will do this summer.  They will graduate from Play Dough to Sculpey clay.  Everyone enjoys playing with clay.

My marbled clay beads.
 
There are so many different ways you can shape the clay to create beautiful beads, charms and pendants.  The indention in the flowers to give the petals shape was made with a pencil eraser.  I have gathered different utensils the kids can use to give their clay shapes just the right detail.
 
It will be exciting to share my love of crafting and sewing with the next generation.  I can't wait to see what creative ideas they explore.  If you live in the Fort Worth, Texas area check out my flyer for the Craft and Sewing Camps.  If not, consider offering a camp in your area to share your creative passion with someone younger.  

Craft On!
Danna

Friday, April 24, 2015

Baby Book Cover Sign

At my school this year there has been a large group of pregnant teachers roaming the halls. In one grade level all but one teacher is pregnant and he is a man.  I told him I thought he was safe from the pregnancy bug but his wife might not be because she also teaches at our school. 

Well the time has come for the baby showers to begin.  The first one was last week for a teacher who is having a boy.  I wanted to create something simple yet useful for her new bundle of joy.  I decided that a book cover sign would work nicely.

The sign - personalized with the baby's name.
 
The sign is covered with a scrapbook paper background and wide rick rack on the top and bottom.  The paper and button at the top is glued to a clothespin allowing for the card to be changed. 
 
The button and circle are glued to a clothespin.
 
I made the card out of book pages from chapter books and picture books.  The heart says We Love You in the center.  The clothes pin will allow for the mom to change out the card for pictures or other keepsake items. 
 
The sign without the card attached.
 
The name was made from stick on letters.  This sign will provide the perfect spot to clip that new photograph or as he grows that freshly painted picture of the flowers and sky.
 
To wrap the gift for the shower I placed it in a simple brown sack and attached a pin made from scrap fabric and buttons.  The pin can be worn by the mom or clipped to a diaper bag for easy recognition.
 
Simple gift wrapping.
 
Now I only have to make a few more for all the other expectant moms in our school.  I might make one for the male teacher just in case.  If you are curious about how to make a book cover sign check out these posts for instructions and ideas.  Valentine's Book Cover Signs, Christmas Signs and Book Cover Sign How To.
 
Danna


Wednesday, April 22, 2015

Gift Basket for under $20.00

My husband is part of a Barbershop Quartet group.  They recently had a concert and held drawings for gift baskets.  We decided to do a "Kids Snack Quartet" basket as our theme.  Since quartets have four members we selected four of each snack and toy item and placed them in a large plastic bin.

This basket was stuffed with snacks and toys.
 
We purchased most of the items at the local dollar store.  In the basket was everything from puzzles, flying rockets, sidewalk chalk, gum, candy, popcorn etc.  Most of the items came in multi packs for only $1.00 each.  Our overall total was about $19.00 for everything including the plastic bin.
 
I then wrapped the basket in plastic and secured it with ribbon and a tag. 
 
The wrapped basket ready for the drawing.
 
The tag read "For Future Quartets - Four of Everything"
 
This basket was quick and easy to put together and would be great for a family that had several kids.  Each child could have their own snack and toy from one basket.  I think I will keep this in mind the next time I need a gift for a family celebration. 
 
Danna

Monday, April 20, 2015

A Great Birthday Weekend

This last weekend was my birthday so my husband and I took Saturday and celebrated.  We drove about an hour south of our home to an event called Antiques Alley.  It is a 37 mile long stretch of yard sales, flea markets and downtown square festivals.  Click Antiques Alley for their website.

We decided since it had rained fairly heavy the night before that we would check out the downtown square festival first in a small town called Grandview.  This town is in the center of the 37 mile event so we figured it would be a good place to start.  We walked around town and looked at all the booths, garage sales and small flea market area.  After having lunch we headed down the Farm to Market road toward our home.  The next town was only 11 miles away.  It took us two and a half hours to drive 11 miles.

In that 11 miles were three large pasture flea markets of 150+ booths, countless garage sales and  smaller flea market areas.  We stopped at a few of the smaller flea market areas but did not have time to fight our way into the larger ones.  The drive home even though it was bumper to bumper traffic in some areas was very enjoyable.  My first thought as we drove down the FM road was "Where has this event been all my life?" 

As we entered the next small town there were garage sales everywhere.  And I do mean everywhere.  We only drove about 8 blocks and there was a sale at almost every house.  Since we did not have any idea that this event was this large we did not allow nearly enough time to stop at the larger areas.  We made furious notes on the map for next year as we drove past each section.

We did buy a few things and had a great day driving the country roads in the beautiful spring weather in Texas.  With all the rain we have had recently everything was green and in full bloom.  I am planning our visit for next year and will be putting money away starting now.

Here are the few things we bought below.  We did snag a great TV cabinet for our game room for only five dollars (but it is still in the van so I don't have a picture).  We also bought a great graduation gift for our daughter who graduates in a few weeks from college.  Of course there is no picture of that because I don't want to spoil the surprise.

This is the traffic at one of the larger flea markets.
Cars were stacked on each side of the road.

I bought all the plastic toys and cards for a Kids Craft Camp I am
doing this summer.  We will be creating some exciting items with these tools.
 
If you have an event in your area like Antiques Alley post a comment below so other can find their flea market/garage sale event of a lifetime.  Happy hunting.
 
Danna

Sunday, April 19, 2015

Denture Cleanser - A New Use

If you are like me you are constantly looking for ways to get items clean and stains out of fabric.  I have acquired a bag of vintage linens and have been going through the bag trying to decide what to do with each piece.  The bag contained several bread basket linens that were badly stained.  The stains were probably made from grease and were very large on one of the linens. 

The bread basket linens with the bad stains.
 
I decided that I would try a method I had heard about years before and always wondered if it really worked to remove stains and brighten up white linens.  The method calls for using Denture Cleanser tablets in a bowl of water.  Yes, you read that correctly - Denture Cleanser.  I thought I had nothing to lose since the linens were not in a usable condition.  So I began the process.
 
I used the Dollar General brand of cleanser.
 
I placed the tablets in a bowl of water and added the linens.  I let them sit overnight and every time I walked by the bowl before going to bed I did move them around a little.
 
I was concerned at first that they might turn green but them reminded
myself that the cleanser did not turn the teeth green so it was probably okay.
 
The next day I removed the linens from the cleanser, rinsed them and hung them up to air dry.  The cleanser did not remove the stains completely but they are far less noticeable than in the beginning.  I think if the stains were newer the cleanser would have removed them completely.  It did make the fabric brighten up really well. 
 
The smaller one the stains are barely noticeable.

If you look closely you can still see the faint outline of this stain.
 
I am not sure what I will do with these linens but at least now they are in better shape to use or cut down than before.  I am curious if this would work on regular clothing?  I might have to give it a try on some of my old shirts that I can't seem to brighten back up.  I will let you know how my experiment turns out.
 
Danna


Friday, April 17, 2015

Dish Towels - I must have an addiction!

I have been on the lookout lately for plain dish towels that I could spruce up a bit to add to my Etsy shop.  Everyone can use a new fun dish towel.  Anything that will brighten up the job of washing those dirty dishes or cleaning the kitchen is a win-win situation in my house.

When I recently came across some bright spring colored dish towels that were on sale I snatched up the last bundle with excitement.  They are fun spring time colors so I wanted to add something to them that resembled spring flowers.

The first of the bundle embellished.
 
The first one I made by adding a wide band of orange gingham checked fabric and a grouping of yoyo's in coordinating fabrics.  This was a simple process and it turned out sooo cute.  (It might have to stay in my kitchen.)  I have five more in various colors left in this bundle.  It will be exciting to see what ideas bloom soon for the others.
 
Yoyo's are a great way to add a simple embellishment
to many different items.
 
In my cabinets I had stuffed (I mean - stashed) some dish towels from a while back.  They are black and white.  Now black and white is a classic combination.  And if you add an additional color to that combination it is just down right fantastic.  I added a yellow flower applique to the center of the black and white striped towel and topped it off with a large black button in the center.  To soften the edge I added a pale yellow gingham checked ruffle. 

Simple and striking!

The flower applique came in a kit with several other flower appliques.
 
The next black and white towel was checked so I added some leftover quilt squares along one end.  It was quick and easy to add the squares and run a decorative stitch around the edge.
 
The four outside squares are scraps from a friends baby quilt she made.
 
The center square is from my grandmothers fabric stash. 
I have always loved this fabric and was excited to use it for this simple project.
 
Dish towels as I have stated before make a great gift for any occasion.  And if it is a personalized or handmade dish towel it is even better.  So the next time you are walking through the home section of your local store check out the blank dish towels that are on sale.  Snatch up a few and make a gift that will impress all your friends and family.  Maybe they will invite you to dinner and you can use the towel to help with the dishes.
 
Danna

Wednesday, April 15, 2015

What's That Sewing Machine Foot Used For?

In the previous post Denim Pennant Banner I used double folded bias tape on the top of my banner to connect it all together. 

My double sided pennant banner.
 
Since the bias tape I used was not very wide I was trying to figure out how I could make it easier to sew the tape on and get the stitching straight.  While I was digging around for an idea I pulled out a foot for my sewing machine that sparked an idea.  The foot has a small wheel guide on the right side that adjusts. 

Here is the foot.
 
Now I was not sure what the foot is originally used for but I placed it on the machine and moved my needle slightly to the left.  It lined up my bias tape perfectly and the guided edge would keep the tape and the stitching straight. 
 
This is how it attaches to my machine.
 
When I started stitching I did turn my pennants so they faced into my machine so the correct edge would line up on the foot.  This was a little awkward at first but since it kept the stitching nice and straight it was worth the effort.

My bias tape lined up with the foot
and the machine needle moved slightly to the left.
 
Once I was finished I was curious what the original purpose of this foot was so I looked it up in my machine book.  It is the Blind Stitch Hemming Foot.  Since I do not sew a lot of clothing I probably have only used this foot once or twice in my lifetime.  No wonder I was not sure what it did. 
 
The next time I need to line up something narrow and stitch it a long way I will pull out my Blind Stitch Hemming Foot and put it to use.  It may not be the reason I have it with my machine but at least it will get some use in my lifetime.
 
I wonder what other feet I have that will make my life of sewing and crafting easier?  Do you have a unique way to use your machine feet?  If so, post a comment below and share your knowledge.
 
Danna

Monday, April 13, 2015

Denim Pennant Banner

I have been in the long process of trying to clean out my bags of scraps that are stuffed in my sewing/craft room cabinets.  I came across a bag of denim and decided to create a pennant banner.  This project actually pulled from several different scrap bags.  The denim bag, a bag of gingham checked fabric and a bag of vintage table linens.

The banner has 12 pennants.

I started by cutting the pennant shapes using my pinking shears to give the edges a finished look that would not ravel. The denim was heavy enough so there was no need to double the pennants.  Using the corners of the vintage cloth napkins I stitched them to the top of each pennant shape.  This created a nice overlap and good color contrast.  To finish the front side of the pennants I added a simple yoyo to the point of the napkin corners.  The yoyo's were made from the gingham checked scrap bag.  I alternated the three colors of pink, green and yellow.

Each pennant is topped with the corner of a vintage cloth napkin.
 
Since the denim was a dark blue there is a distinct color difference between the front and back sides.  Therefore I was able to create two banners in one.  For the lighter blue side of the pennants I added a simple strip of the gingham checked fabric to the top.  I cut the strips about 1 1/2" x 6" and then clipped the ends in a two point banner style.  I matched the gingham strip to the same color yoyo that was used on the front side of the pennant.  I then secured these strips to the top edge so they would not slip when I added the bias tape to finish the banner.
 
The "back" side of the banner. 
 
To complete the pennant I used a double folded bias tape in a dark blue to match the denim.  I used the entire package of 3 yards of bias tape.  When adding the tape I pinned my pennants with the side points touching so they were evenly spaced.  My banner has twelve pennant shapes, three colors of gingham check fabric and the corners of three vintage cloth napkins.  Overall the pennant banner turned out to be more fun than I had imagined.  This would be a great addition to any room or a festive two in one look for a celebration or photo shoot.  This particular banner will be posted on my Etsy account soon.
 
So, if you have some leftover denim from a previous project and are looking for a way to use it up try making a pennant banner.  This project would be great for a 4th of July banner simply by changing the fabric choices to a patriotic theme.  Who knows what fun you will have creating yours.
 
Danna
You get two looks in one banner.
 
I'm linked up to Lambert's Lately
 

Friday, April 3, 2015

Dry Fingers Frustrating You? I Found a Simple Fix!

I don't know about you but I have always had trouble gripping things when I was sewing and crafting.  I have extremely oily skin so turning pages in a magazine was a real hassle.  Also, I am not one of those people that likes to lick my finger and then turn a page that just kind of creeps me out.

For years as a secretary I used "SortKwik" fingertip moistener when I was working with any kind of paper or filing.  One day as I was quilting and trying to separate my small quilt squares I was getting more and more frustrated by the minute.  It hit me "Get the SortKwik."  It occurred to me that the moistener might stain the fabric but I was so frustrated that I didn't care.

After lathering up my fingers I was able to separate the quilt squares easily.  Since then every time I quilt or craft the first thing I grab is my "SortKwik".  I have never had it stain or smear a piece of fabric or paper.  I even use it when I am making jewelry.  It helps to grip the beads and the wire.

This is the brand I use but there are several others on the market.
I get mine at Walmart in these small containers.

Simply apply to your fingers and you will be able to pick up almost anything.
 
I like the small containers that Walmart sells.  There are three per package so I can have one at my craft table, one at the computer and one in my sewing bag.  I have not resorted to keeping one in my purse but there have been times I have wished I had one on hand.  Maybe the next package I buy I will toss one in for good measure.
 
So if you are struggling with grabbing your quilt squares or paper projects reach for some SortKwik and put your frustrations to rest.
 
Danna

Link Parties: Chic on a Shoestring

Wednesday, April 1, 2015

Pinterest Challenge and Giveaway - Finished

Okay, so I had great hopes for the Pinterest Challenge and Giveaway that I started on March 1st.  But it seems that my life got a little chaotic and I did not follow through on posting my Pinterest pin each week.  Also, no one ever posted any comments about which pin they had tried.

So, lesson learned: the next time I post a challenge make sure I have everything (all subsequent posts) ready to go in case life goes haywire.  Also, spread the news better about the challenge and encourage others to join in the fun.

I am not giving up on this challenge I will try again this summer when life at my house slows down a little bit.  I will keep the giveaway item and add to it for the re-posting.  So if this challenge peaked  your interest start pinning all the fun things you want to try so when the challenge is re-posted you can be the first to leave a comment and encourage the rest of us.

Thanks for visiting my crafty haven and enduring my ramblings at times. 

Danna

P.S. This is not an April Fool's joke.  I will try the challenge again this summer!

Friday, March 27, 2015

Another scrap bag! - Red, White and Blue

In the previous post Use It or Lose It!  I described my new process to work through the many scrap bags of fabric in my cabinets.  This particular scrap bag was all red, white and blue fabrics that were in my friends stash and she passed it on to me. 

The scrap bag of Red, White and Blue fabrics.
 
I will admit this bag was fun to work on because the fabrics were really cute.  It did have several orphan blocks in the bag along with scraps of various sizes.  To find out more about my love for orphan blocks check out this post Orphan Blocks.
 
Some of the orphan blocks in the scrap bag.
 
I have already made several projects with these scraps and still have a few left to use up.  One of the first projects was two dish towels with pieced strips.  I took the various strips of coordinating fabrics and sewed several rows together to create a band. 
 
Various length strips sewn together to create a band.
 
I then sewed the band down to the edge of the dish towel with a zigzag stitch.  I left the raw edges showing and stitched around all four sides.  I liked the raw edge because it gives the towel a more rustic feel rather than a formal feel.  The fabrics were too fun for a stuffy feeling.
 
The raw edges secured with a zigzag stitch.

The finished towel will be festive for July.

Simple yet festive!
 
My process seems to be working well for using up scraps and getting all the bags out of my cabinets.  Don't tell my husband but if this keeps up I will have room for some new fabric!! There are several more projects in the works from this bag but I will post more about them later.
 
Danna